Showing posts with label Drawing with Children. Show all posts

Friday, October 30, 2015

Tempera and Chalk Sugar Skulls

This art lesson works well for grades 6 or 7.  It is good to start with a study of the traditional Day of the Dead customs from central and southern Mexico and learn the basics of Zentangle design (see my previous post).  This follow up lesson uses patterning and bold colors in tempera and chalk to create a brightly colored sugar skull painting on watercolor paper. 

Our mixed media sugar skulls radiate strong personalities and bold colors.

The lesson starts with a blank skull shape pre-printed on watercolor paper.  Details are added in pencil, then outlined with black marker.


Jillian draws face details in pencil.
 Trace over the pencil with a bold, black marker.
Paint in areas using tempera paints.
Jillian paints a yellow red design over the yellow background.

Using thickened tempera paints to keep the colors bold and bright, start painting the lightest colors first, then add the darker colors.  


Melody's skull has a cowboy theme.
Gretchen adds octopus tentacles to her skull.

After the paint dries, cut the skull out.


Next, mount the skull on mat board backing with glue, and use chalk pastels to add more details and a border around the painted skull.


The proud artists show their beautifully decorated sugar skulls:


Jillian


Melody


Gretchen


We are looking forward to creating more exciting art together very soon, and hope you will visit us again in the studio.

Betsy


Wednesday, October 28, 2015

Zentangles: Spinning Beautiful, Tangled Webs


Our project today is to create a web sampler filled with tangles.

Art class at Bear Paw Studio this week is an introduction to the art of creating Zentangles (or ZT for short)-those fun, elegant designs that have the benefit of helping us develop focus and confidence in our drawing.  

I've always loved filling empty paper spaces with squiggles and patterns of radiating design, you know, along the margins of lists and phone notes, otherwise known as doodling.  Zentangles are different in that they are created with deliberate intent, and though the final result may be unplanned, there is an effort to make patterns.  Some patterns are simple and loose, but many are intricate and tight, and some have color, shading, or 3-D illusions.  There are many benefits of tangling, such as de-stressing, increasing focus, attention span, and confidence in drawing.  However,  Zentangles are addicting, and may be hard to stop once you start, since one good stroke often leads to another!

Our class on tangling started with a slide presentation covering the basics of tangling and showing many examples of different styles of Zentangles.  My friend and a more experienced tangler, Sue Zache, was kind enough to lend me many of her excellent books and journals filled with wonderful tangles she has created over the years. 

Zentangle examples on display included how-to books, journals, and fabric.

After the introduction and slide show, we learned a few basic tangles and tried them out on a practice sheet.  One of the nice things about ZT is that you can improvise and create your very own patterns if you like, or follow stroke by stroke directions to learn designs created by others.

Melody adding some new tangles to the practice sheet.

Gretchen works on details of her own design.

There are endless ways to tangle, and there is no wrong way.


Sue helps Melody and Gretchen with their designs.

Focus and planning keep patterns consistent.
Tangling focuses the mind on the task at hand, creating a "zen" or meditative state of mind that is calming and stress-relieving.


Our ZT project today is to create a "web sampler" filled with tangles we create ourselves or ones we learn from others.  We use a compass to draw three concentric circles of our paper, then add web lines to create interior sections which we fill with different tangles.  We finish by gluing the completed web to a mat board backing and adding a title.


Gretchen knows what she likes, and fills her web spaces with many intricate  tangles of her own design.


Gretchen's web is almost done.

Jillian has her web filled with creative patterns.


Jillian's is filled with fabulous texture and pattern, including the spider.

Melody has a web of creative designs that is still growing.

Melody's web is a nice mix of simple and complex patterns that create a lovely design.

We will continue with patterning in the next lesson, when we will mix sugar skulls, Day of the Dead, colorful painting, and Zentangles all together to create some amazing art!  Please join us again in the next post to see what we do!

Till next time,
Betsy


Wednesday, October 21, 2015

Ukiyo-e Art with a Side of Manga and Kanji

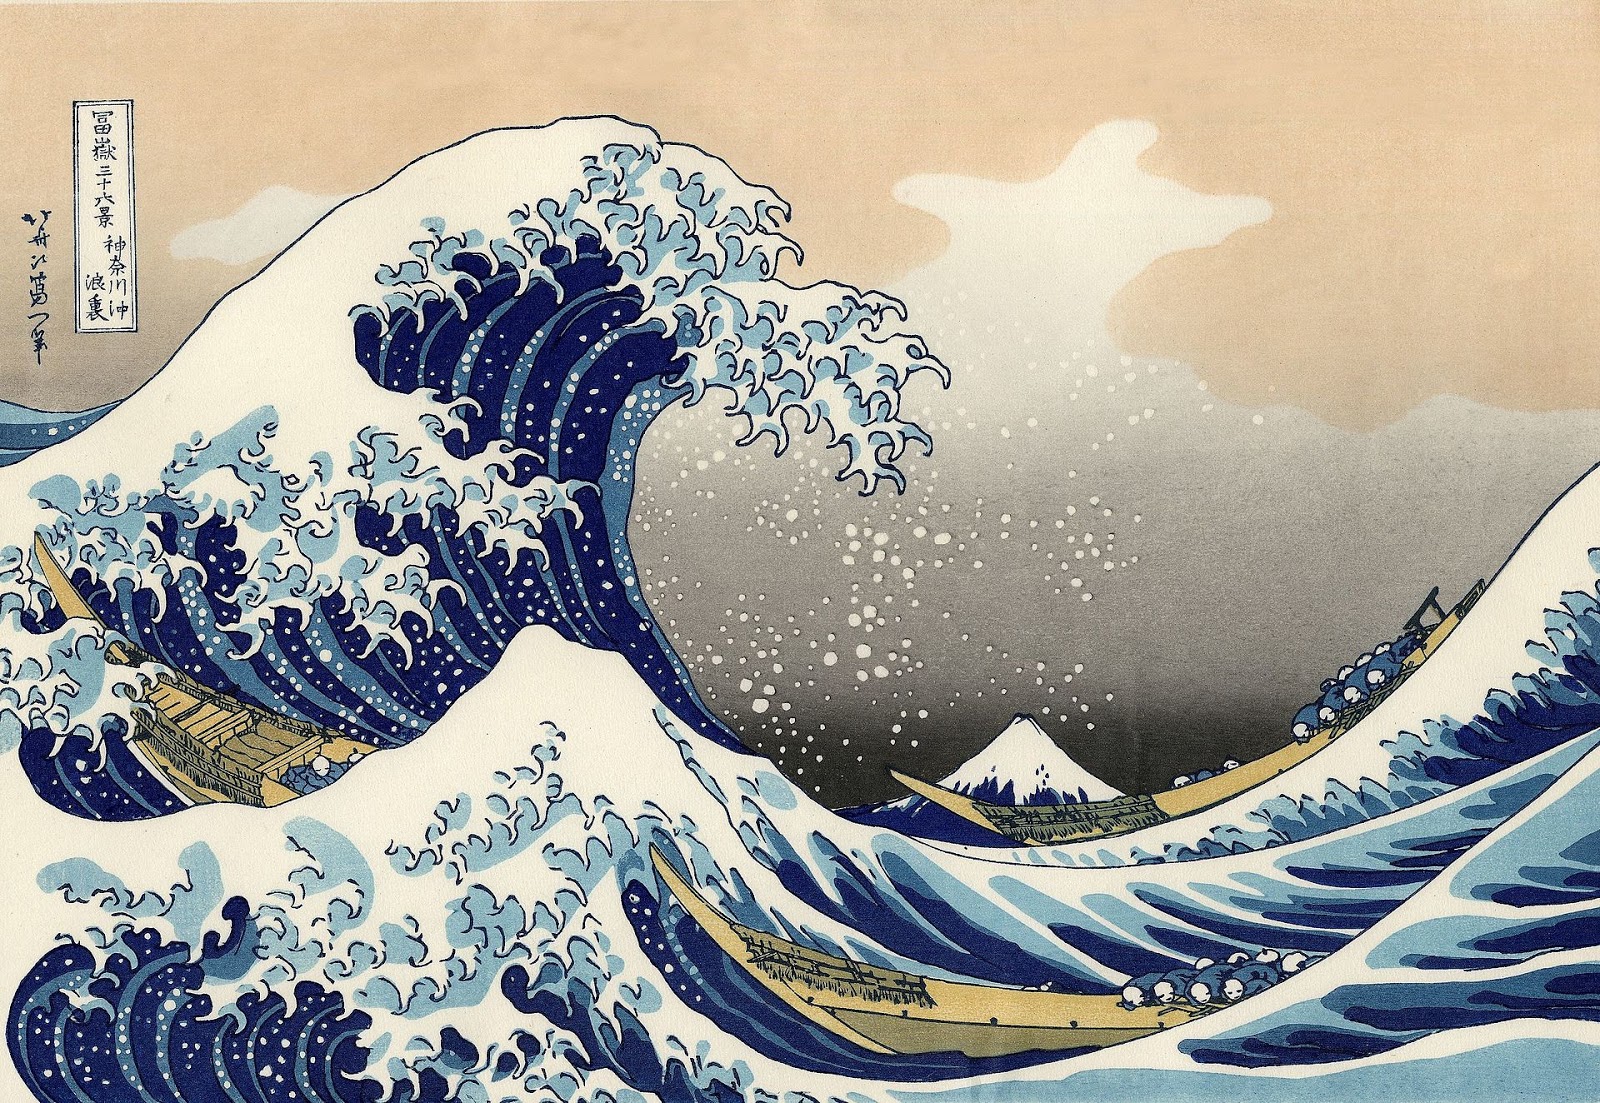
Bear Paw Studio is finally back in operation with an exciting art class for middle and high school age students on Japanese art, specifically Ukiyo-e, or "Pictures of the Floating World."  This is probably the most famous example of an Ukiyo-e woodblock print, The Great Wave off Kanagawa, painted in 1831 by the master, Katsushika Hokusai.


Hokusai, "The Great Wave off Kanagawa" 1831


In our first 3-hour session we learn about the origins of Ukiyo-e from a slide presentation and an excellent short You-Tube video by Phil Hansen, GBAacademy.com, along with several good library books I found on this art form.  In the presentations and books, we are introduced to two famous Ukiyo-e artists, Hokusai and Hiroshige, and view examples of their work.  The connection between Ukiyo-e and Manga graphic art forms are explored a bit, and by the end of the lesson, we will learn how to write our names in Kanji.
Jillian draws a Geisha girl in preparation for painting.


Ukiyo-e designs can be found on a variety of objects.


Additional Japanese art and our class project (lower right).

To begin our Ukiyo-e paintings, we make a free-hand drawing from reference materials, trying to develop our ability to see and draw shapes instead of objects or features. To help accomplish this difficult task, we turn the reference material and our drawing paper upside-down and draw the shapes we see bottom-to-top, trying not to recognize the actual objects or features they represent.  This technique forces us to observe shapes more carefully. It is challenging, but avoids the pitfall of letting our minds short-circuit our eyes, and rely on our often faulty mental image instead of reality.


This horse drawing by Gretchen was made using the upside down technique.

Here you can see Gretchen drawing from bottom to top,
with her reference photo upside down and partially covered.


Jillian's Giesha drawing.


Jillian's second drawing is another Geisha.


Melody works on her drawing of a Geisha atop a giant Carp.


Melody's drawing.


In the next session, we will use watercolors to paint our drawings, sign our names and titles in Kanji, and mount them on a paper "scroll" for display.  


 To be continued!  Please stay tuned for the rest of the story.


Sunday, June 15, 2014

Inuksuks, Ted Harrison, and More!

Kid's Art Camp - June 9 - 13, 2014

Watercolor Fun - Ready, Set, Paint!


Day 5 - Inuksuks, Ted Harrison, and Moon Birds!

Ted Harrison's art with Inuksuk
Born in England in 1926, Ted Harrison migrated to Yukon Territory, Canada where he taught middle school and painted engaging scenes of life in the far North using bright, bold colors and simple shapes.  The figure in his painting above is an Inuksuk, or Innunguaq, a cairn-like rock formation used by the Inuit peoples for communication or as a trail marker. 

We learned a little about Ted Harrison's life,


looked at a lot of his cool art,


played around a bit building our own cairns and Inuksuks,


and finally got down to some fun painting in Ted Harrison's style!  We used crayon to draw in many layers for the land and sky.


 Then we some strong warm colors in the sky and cool colors for the land.


We used sets of cake paints today, so we didn't have to mix our own colors (Yay!).


We cut an Inuksuk out of black paper to glue in the foreground of our paintings.


Then painted two more Inuksuks in the distance, getting smaller and lighter to show that they were in the middle and background.


by Melody

Our paintings all ended up very bright and beautiful!
Danielle

Gretchen

Hailey

Kaylee

Madyson

Meldoy

With the extra time we had, Danielle, Hailey, and Madyson painted some stunning birds in silhouette.

Danielle

Hailey


Madyson

I loved the beautiful flowers that Danielle and Hailey brought me on the last day as way of thanks!  Love these girls!


That's all for this art camp.  See you next time!